
Our new Blog address
I have had lots of people asking me what my new blog address is because they didn't save it, so I'm gonna put it back up for a little bit :) Thanks guys for being interested in our boring simple life :) You all are wonderful!
Time for a Change....
As you all know, Craig really wanted to make this blog private. I have been more hesitant to dive into the private world since meeting so many wonderful people through blogging :) When I asked for everyones emails a while back when we were going to go private, I got way more than 100 (which is all you are allowed to invite) I didn't want to leave people out, Soooo Craig and I came to a compromise. It was to change the URL of our blog so at least it does not have our last name. Although I am sure it would not be hard to find. But, I think it is a great step in the direction of being safer without having to go private. So without further ado....Here is our new blog:
update *please email me if you need the new link*
It has all the old posts that are on this blog, just a different URL. I will no longer be posting on this blog *which I am sad about since it has been 4 years now *
I am sorry for the inconvenience if you already have this site bookmarked and now you have to change it...Thanks for following, you guys are the best!!!


Projects I've been working on....
Woooh...I am still alive over here! haha. It has been a while since I have posted because i have been sooooo sick. But, with lots of antibiotics and sleep, I am finally on the mend. I thought I would show you some projects I have been working on around the house. Since joining pintrest, I have decided I need to post more of my projects because I always appreciate all those who post on their blogs and share their wonderful ideas with me. So here are a few of mine....it might not be everyones taste, but it's what I am liking for the moment :)
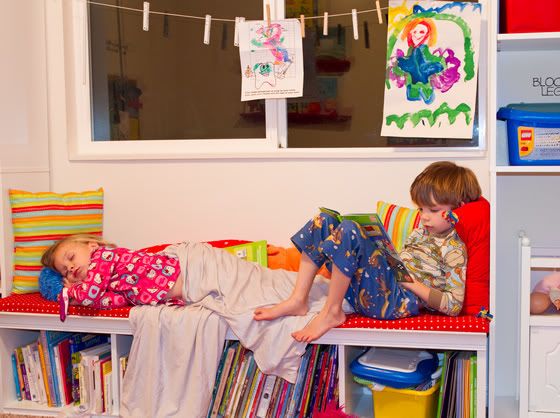
THE PLAYROOM MAKEOVER:
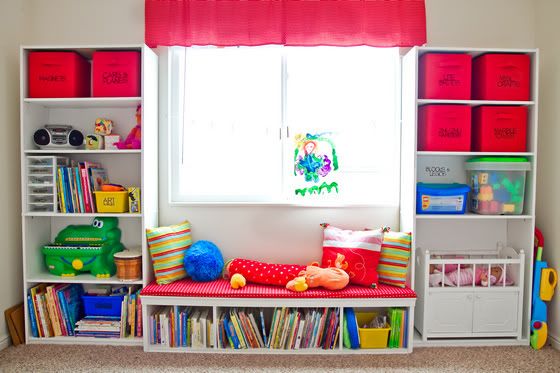 I was desperately trying to find someway to organize the playroom better. I found this bench at the DI for $20, painted it white, then I got a small board to fit the top of the bench from the Home Depot *they even cut it to the right dimensions for me* I got some foam from Joane's (with a 40% off coupon) and put it on top pf the board. Then I wrapped the fabric around the board and foam and staple gunned it to the under side. . I think that's a super easy way to reupholster a bench and now it is so comfy with the foam! I made the pillows and then labeled all the bins (got them from walmart for $5) with my vinyl machine, which makes it so much easier to keep clean now. I got the tall white book shelves from walmart too and now it looks pretty close to a built in window bench :)
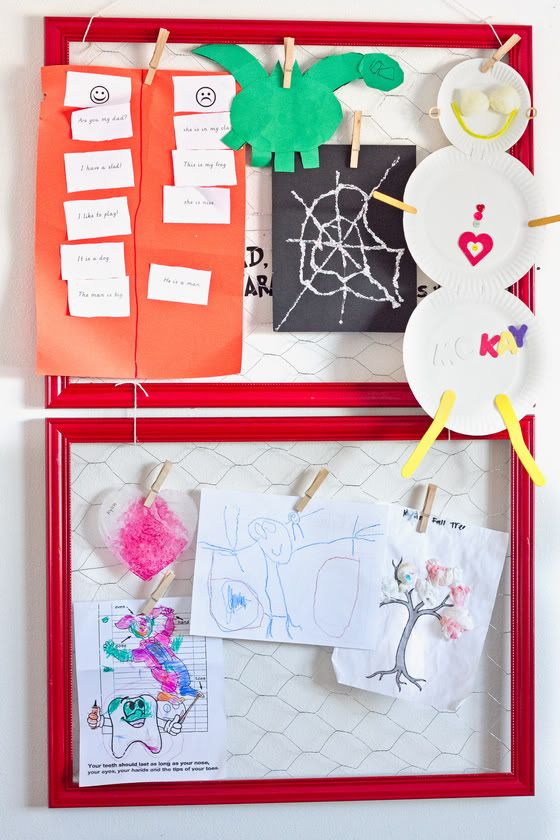 The kids bring home so many cute things from school and I was trying to think of a way to display LOTS of their art. I saw the idea of chicken wire once and decided to get some HUGE frames (each 24x30 inches) from the DI for $5 and then spray painted them red. I bought some chicken wire from my local Cal Ranch store and then staple gunned the chicken wire to the back of the frame..can you tell I love me staple gun. hehe. Then I attached the two frames together with some twine. Now they each have a frame to display their art by using clothes pins. I think it is so cute!
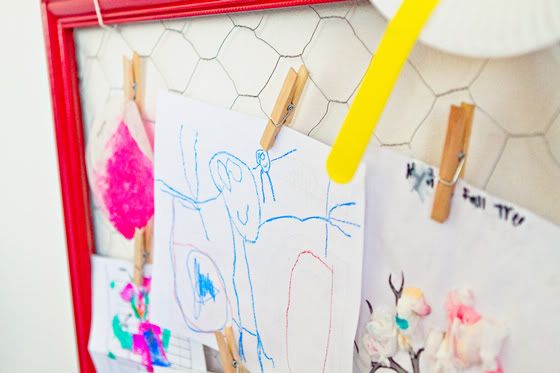 The kids love to color at home too. I saw a really cute metal line you can buy from Ikea to diplay art, but it is $30. I don't have money to spend on something like that. So, I got some twine and ran it across the window and attached it to the wall with a nail and pulled it super tight. Now the kids can attach their new pictures that are drying or their favorites with some clothes pins.
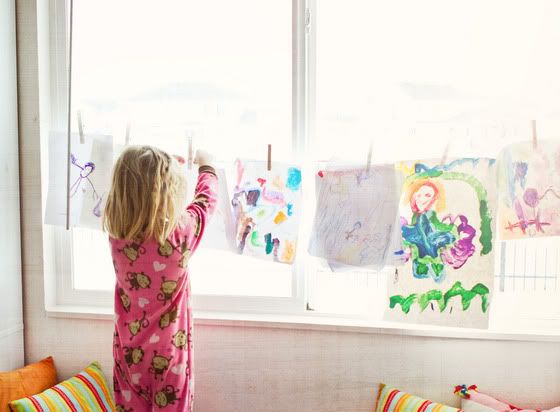
They love their new playroom! Totally worth the work :)
OFFICE PROJECTS:
 I always have to be super organized. SO, I got some bulliton board squares from Walmart for $6 bucks I think. Then I cut them in half with an exacto knife, and wrapped them like a present with some cute fabric. I used masking tape to keep the fabric in place. I printed up Monday-Sunday tages and Now I have a rectangle for every day of the week to hang things i need, put reminders, tickets, or anything else I want. I am really loving it.
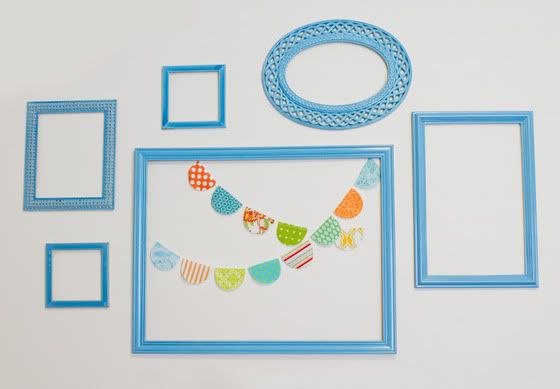 This is also in my office. I was bored with my wall, so I bought a bunch of cheap frames from the DI and sprayed them blue. Then I made this bunting line out of some fabric scraps from my board. I think it's fun and it makes me happy.
KIDS HOMEWORK CENTER:
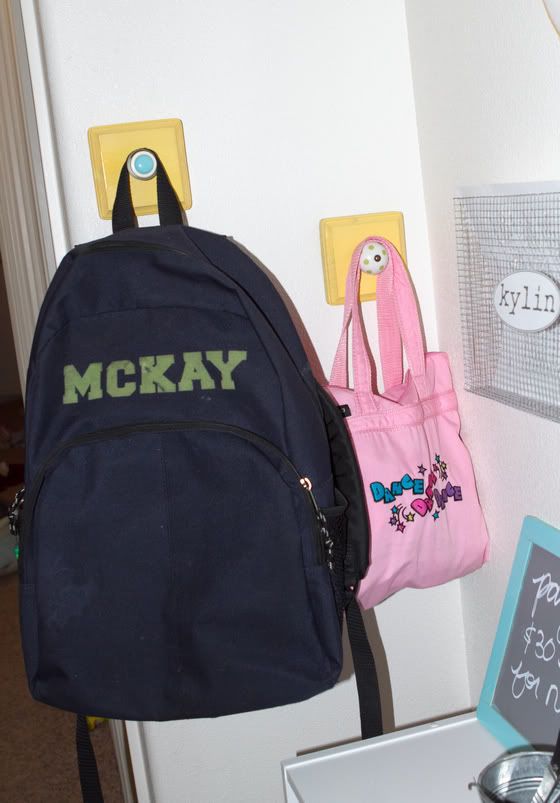
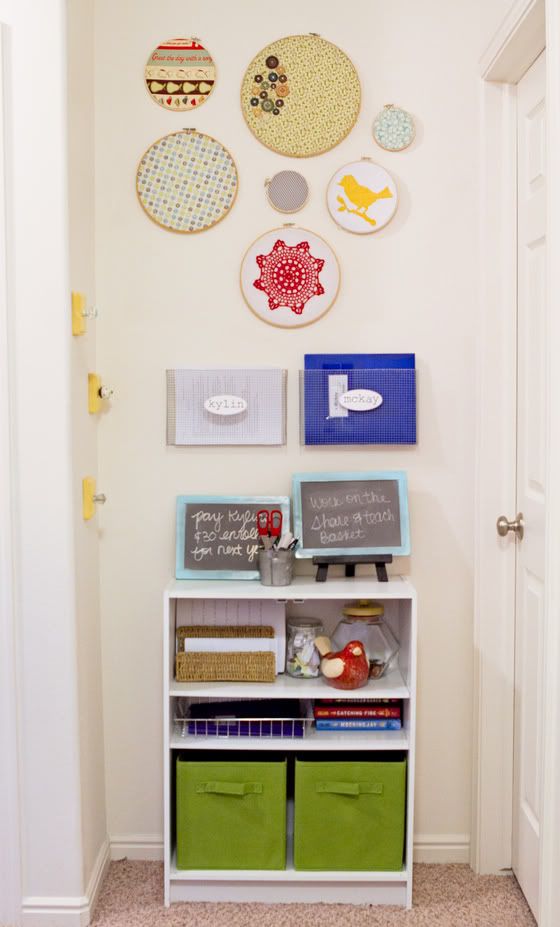 The end of the hallway by the kids room was just a dead zone, so I decided to make it useful. The kids always dump their bags and homework and I have a hard time finding it all. Soooo, here is a spot for them to hang their back packs, put their home work and keep everything "school" organized. Their is a chalk board for each of them for me to write reminders for them. It also has their piggy jar they are saving for Disneyland and "the fun jar".
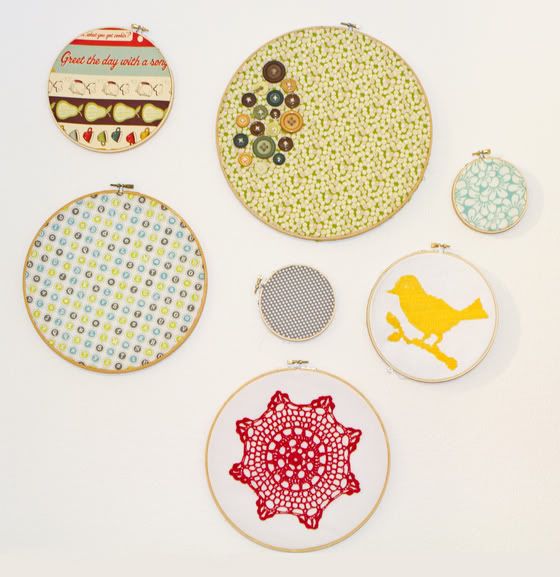 I found some cute vintage fabric that I loved and got some embroidery hoops from the DI. I got an old doily and glued it to one, stitched cute buttons to another and cross stitched that yellow bird. I am loving vintage stuff right now.
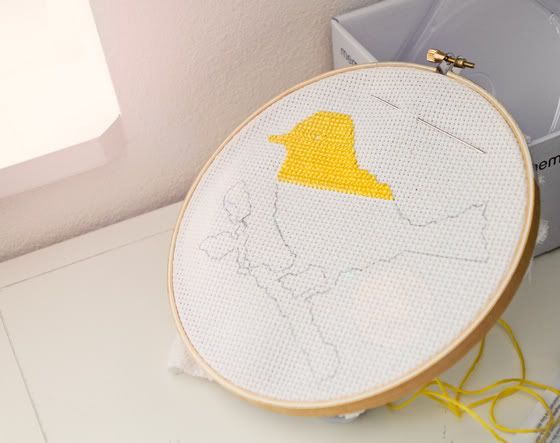 The bird took forever! I haven't cross stitched since I was like 9 and forgot how long those silly things take. I did it every night while watching Tv with Craig. I love that it is a modern take on cross stitching. If you want a pattern, I got it from Martha Stewart HERE.
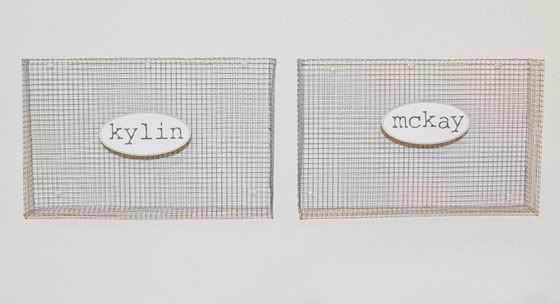
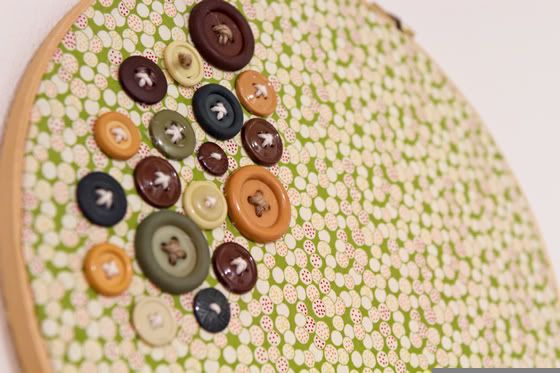 I made these cool bins to keep the kids folders and homework in. I got the wire netting from Cal Ranch too. I saw some of these in a pottery barn magazine that I loved, but they are like $50 a piece. So, I made some :) The tutorial is HERE. I made my measurements a little thinner so that it wouldn't stick out so far.
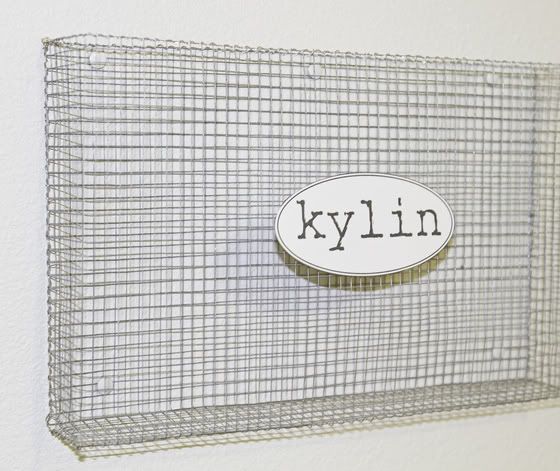
 I got 3 cute knobs from Hobby Lobby and these wooded squares. I painted the squares yellow and then screwed them into the wall for the kids to hang their bags on.
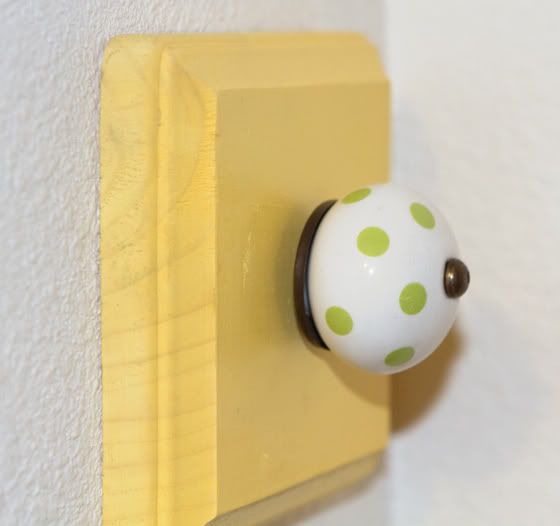
 I have some more things I have been working on, but they aren't quite done yet :) Hope you like some of these ideas.
He does the hokey pokey...
Mckay has a little presentation at school yesterday...it was so stinkin' cute i could die!!! Sorry about the words flashing across the video, just try and ignore it :) Love him shaking his little bootie! haha.
One naughty little kitten....
So, I have to laugh when people tell me that my kids and I are "so put together" and "How do you do it all". It makes me feel GREAT, but here's my secret....really I don't. I only wish. The reality of it is, if I have no where to go *which is most the time* me and the kids are a mess. The house is not always perfectly clean and sometimes *gasp* i am VERY LAZY. haha.
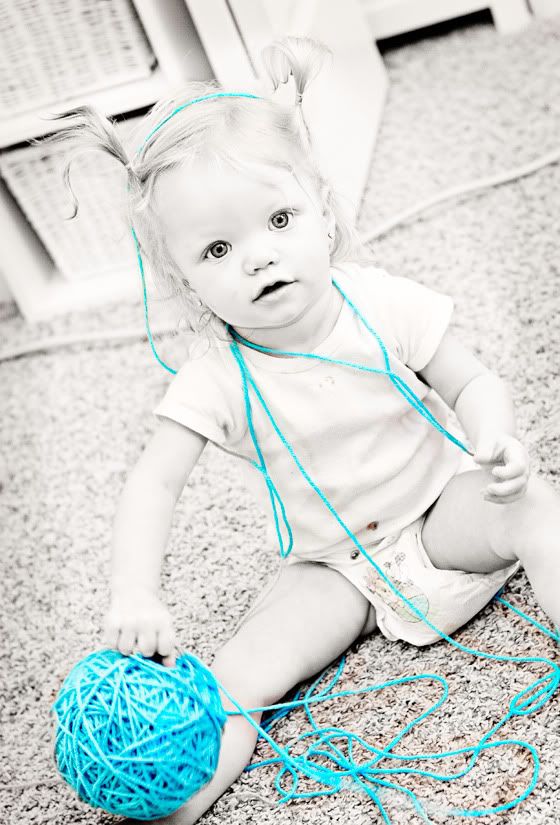
Example: Here is what pip looks like pretty much all the time...diaper, dirty onsie and making a HUGE mess of my house. She is a cute little mess though. hehe. THANKS for emailing me and always leaving me such fabulous compliments...each one always means a lot.
My CUTE naughty little kitten...
 Yes. I hand roll all my yarn because I think it is cuter. Craig thinks I am really OCD. haha. I sit and watch a show with the kiddos and go to town. :)

ps. soooo, I haven't been totally lazy, with photography being slow I have been doing some serious projects around the house. I'll show you all on my next post. Stay tuned....

Just what I needed!
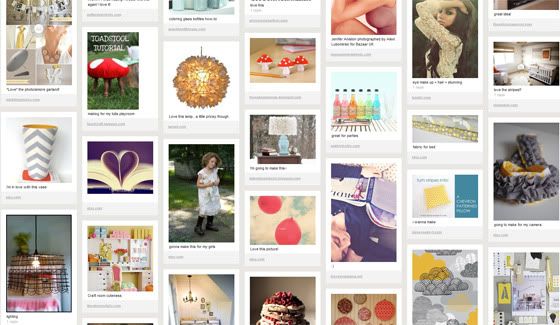
I am a huge fan of finding projects and inspiration from blogs, but it is so hard keeping all the projects and ideas organized. I write stuff down or save them to my computer, but when I want to do the project I can't find it or the site I got it from. So, let me introduce you to something that seems like it was made just for me....Pinterest is a fantastic tool to organize all of your virtual inspiration boards. I AM IN LOVE! If you are browsing a blog or website and see something you love, all you have to do is click "pin it" and it will save it to your board under the category you want and when you click on your pin later it takes you right back to the site you got it from. Watch THIS short tutorial. If you need an invite just email me at kelleyhowephoto@gmail.com.
This is just a snap shot of some of my random pins...you can follow me to see LOTS more, from food to decorating, beautiful photography, crafts and MORE :)
Some Sunshine on a Cloudy Day...
I took these pictures the other day when it was nice and 50 degrees outside right before sunset...golden hour. I love how warm and happy these pictures are and it makes me so happy looking at them. Helps me forget there is a HUGE snow storm outside and just remember the warmth of that afternoon.


Some lovie ideas for your man.....
So, I know I haven't posted in a while, I have been so busy trying to get all done editing all my clients photo sessions. But, I saw these really cute ideas on one of my favorite blogs, The Daybook and since Valentines Day is coming up I thought I would share....they are pretty cute and I am defiantly going to try a few for my Craig :)

- Give your guy a 10 second kiss every day this week when he comes home from work. See the difference it makes!
- Pamper your guy with a nice warm bath. Lots of bubbles too. Have the lights turned off and a candle or two lit. Bring in your iPod home or any other musical device and play some soft music. Take him by the hand and lead him into the bathroom. If you can both fit into the tub ... it's even better ;) If not, take turns ... then give him a soothing massage when you're done.
- Send him on a present hunt. Begin with note #1 on his pillow. The note should include something you like about him and instructions to find the next clue, and so on. End up at your mailbox and have a present in it. It doesn't have to be anything expensive. Your thoughtfulness will be enough to show him that you love him.
- This week for your Friday night date cook a meal together. You might try a new recipe you've never tried. Set the mood by already having the table nicely spread with tablecloth, napkins, dishes and silverware. Ahead of time buy your guy a new book by one of his favorite authors and present it to him after the meal is over. Then tell him to relax with his book on the couch while you clear away the dishes.
- Go for a drive with your honey along some scenic route you like. Bring along your favorite CDs and listen as you drive and catch up on the day or week's happenings
- Rent an old movie and watch it together with popcorn and your favorite soda on a mattress you've put on the floor. Cuddle under a warm blanket and have a sleepover in your living room when it's over.7
- Begin each day with the words "I love you" whispered to your guy while you're still in bed. It will set the tone for your entire day. End each day this week with the words "Thank You" whispered to him before you drift off to sleep.
- Another bath idea! Arrange a profusion of candles in the bathroom. Prepare a bubble bath. Play some nice romantic music. Pour two glasses of sparkling cider to toast away the cares of the day. Get into the tub and then call your guy, "Honey, I forgot my towel. Could you please bring it to me?" You'll have no problem keeping his undivided attention after that! :)
- Dedicate a song to your guy by calling a radio station that takes dedications. Make sure he's listening when they play it!
- Declare your man "king for the day", probably on Saturday when he is home. Begin the day with breakfast in bed (you could even pick up a king crown at Burger King and have him wear it) Pamper him with foods and activities that you know he will enjoy throughout the remainder of the day.
- Pack a late night picnic on a night when there's a full moon. Bring a blanket and some yummy treats and have an evening under the stars. *maybe when it gets a little warmer. hehe
- Get some glow in the dark stars and spell out "I Love you" on the ceiling...your message will be reveled when the lights go out.
I'm excited to do some of these. Now let's get lovin' on those boys!
my lists freebie....
I made these for myself since I am a HUGE list maker and I thought I would share them with all you all in case you are too :) I wanted to try and save some trees, so I printed them and put 2 of the lists back to back and laminated them so they are double sided. Mine are To Do List/Weekly Planner and the other Weekly menu/shopping list. That way I can use a dry erase marker and just erase and add as I need to instead of using TONS of paper and always trying to find my gazillion lists! When I need to use my shopping list at the store all I do is take a picture of it with my iphone.
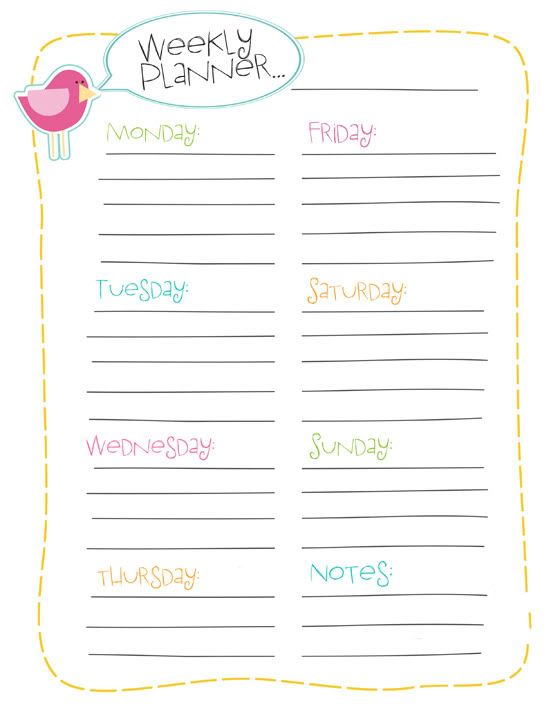
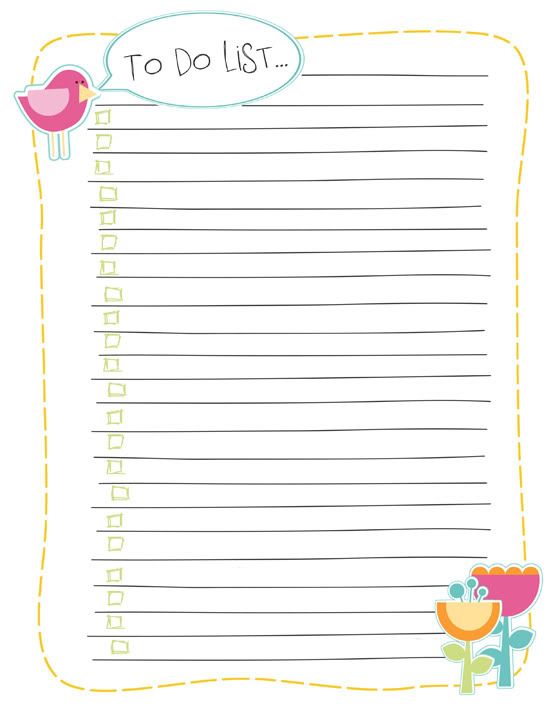
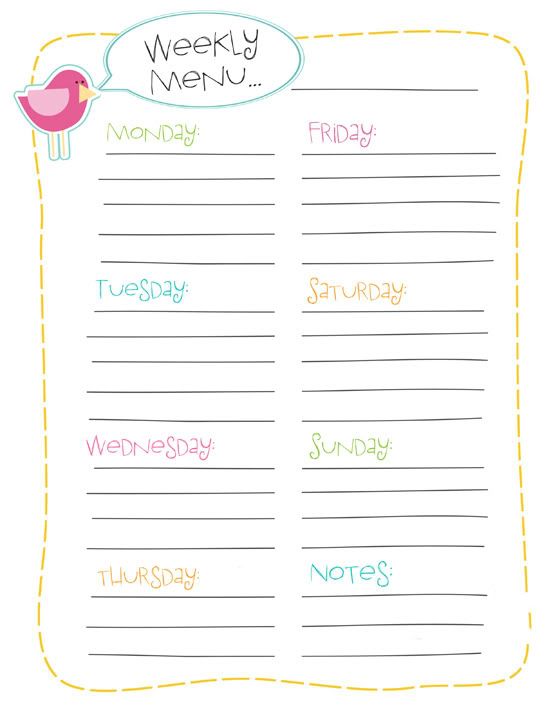
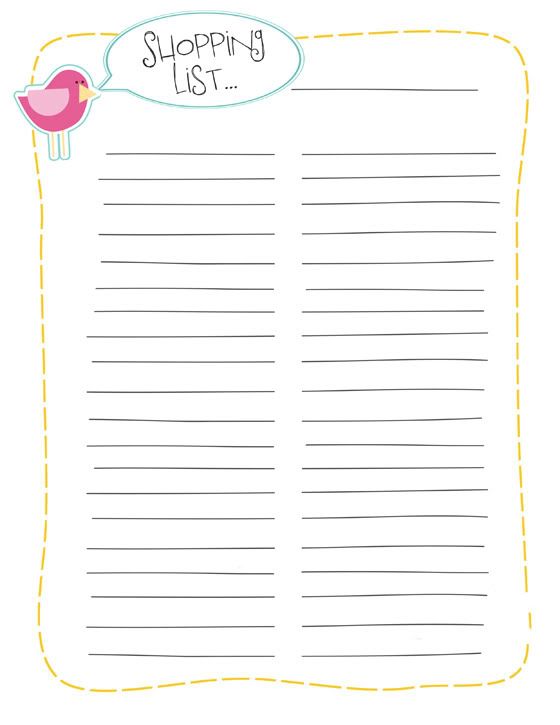
If you want to download my list templates, just click on the picture and it will take you to the DL link. :)
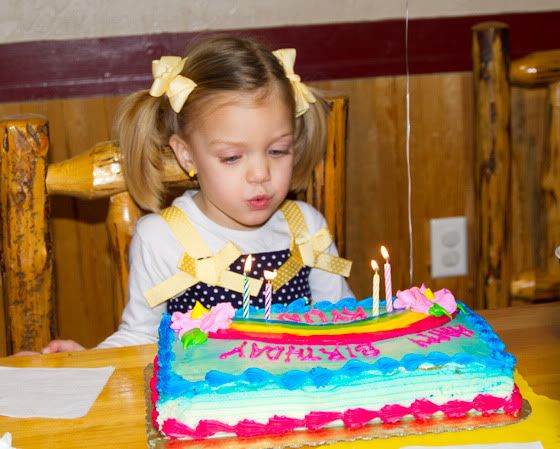
Kylin's birthday parties....
We had 3 different parties for Kylin this year! One with each of our families and then she had a friend party. She had a blast and every single one! I know I decorate like crazy for birthday parties and go all out, but I love to because I really like making my kids feel SOOOO special on their big day. I figure there really is one once a year that is YOUR very own day....so make it BIG! Here are a few pictures....
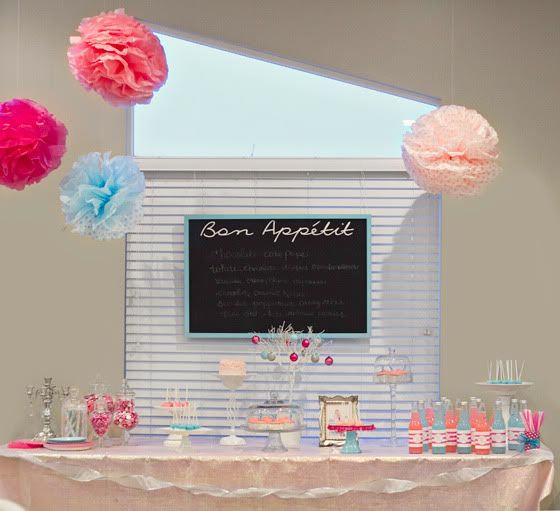
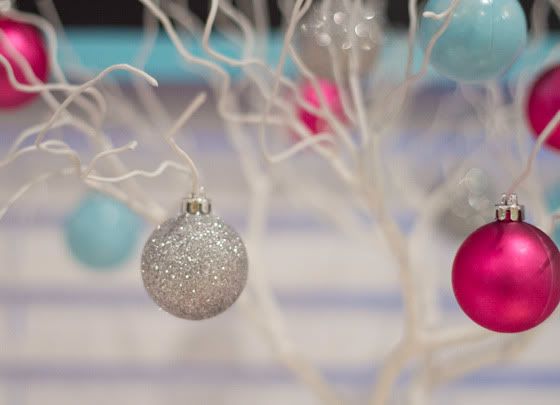
THE DECORATIONS:
Kylin wanted lots of pink, so I decided to do a "frosted princess" kind of theme. Lots of pinks, light blues and silver...
 I wish you could see it all closer...I was really happy how it turned out :)
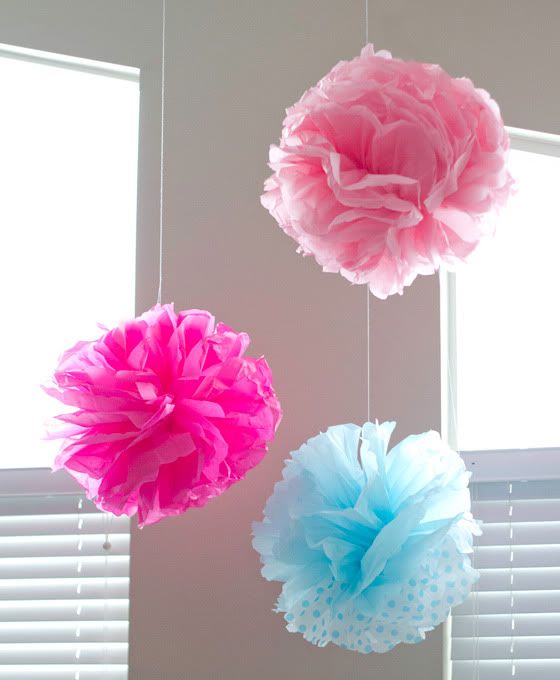
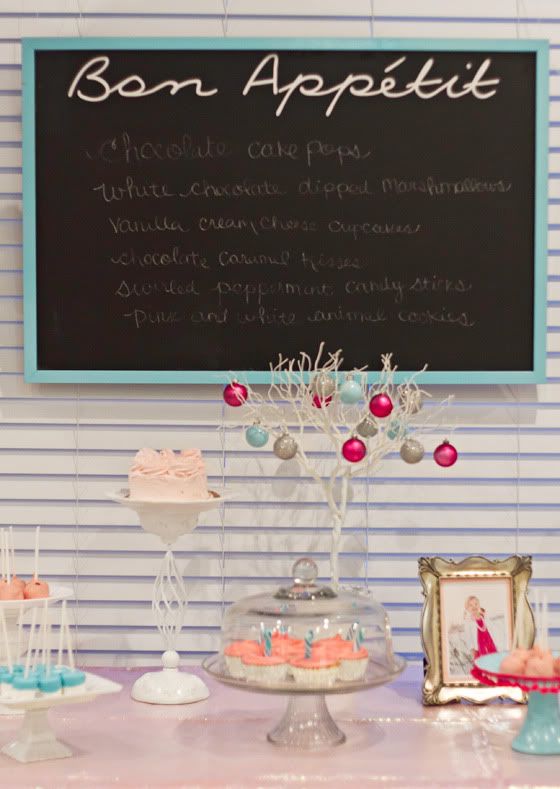
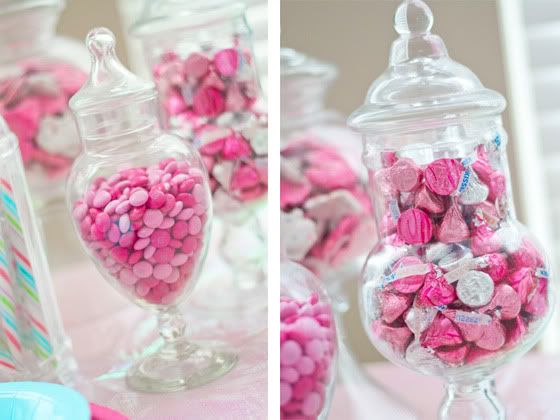 Of course we had lots of sweets and goodies. Ky has a HUGE sweet tooth :)
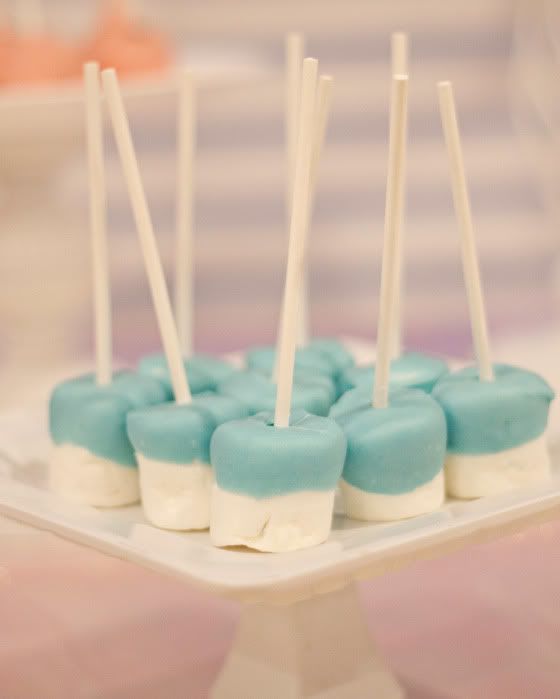 These are marshmallows dipped in white chocolate that I colored blue.
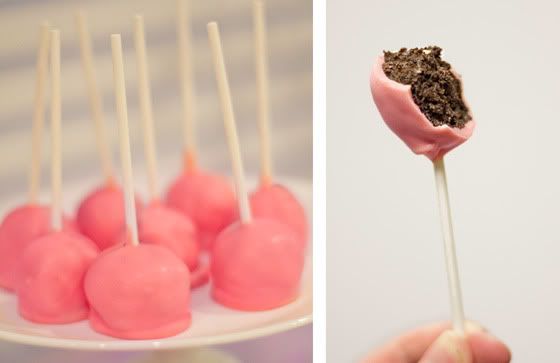 These cake pops were YUMMY, easy, and so dang cute. HERE is the recipe. LOVE EM!
 These drinks are Jones blue soda (my favorite) and pink lemonade. I ripped off the other labels and made some custom ones with a "K"
  I made yummy cupcakes with almond frosting...there always has to be cupcakes because I am in love with them. hehe. I decorated them with candy sticks that I found with the wedding aisle at walmart.
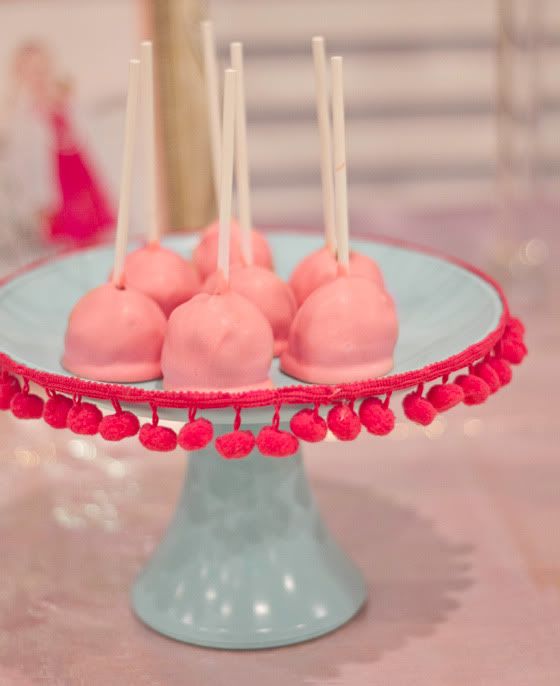 More cake pops since they were such a big hit I had 2 stands of them. I made all the cake stands myself out of candle sticks, plates and pray paint :) on this one I glued a cute trim.
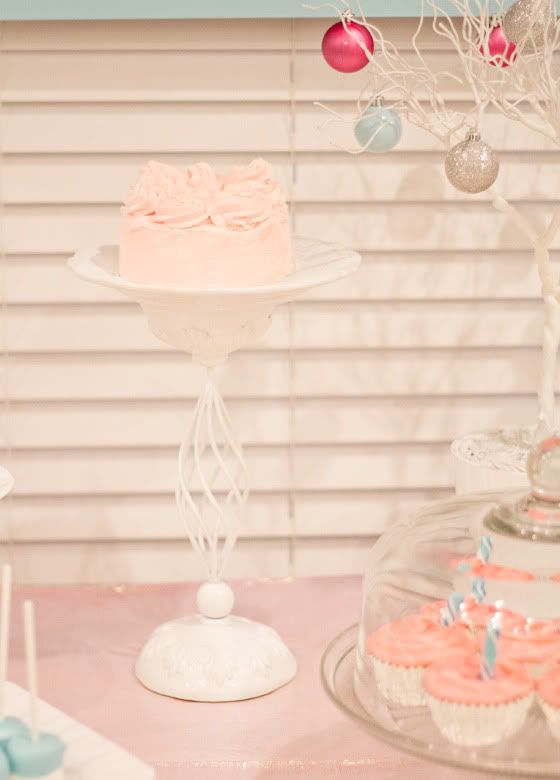
This is my favorite cake stand I made...found the plate and base at DI and sprayed them white...I think it's really pretty and unique.
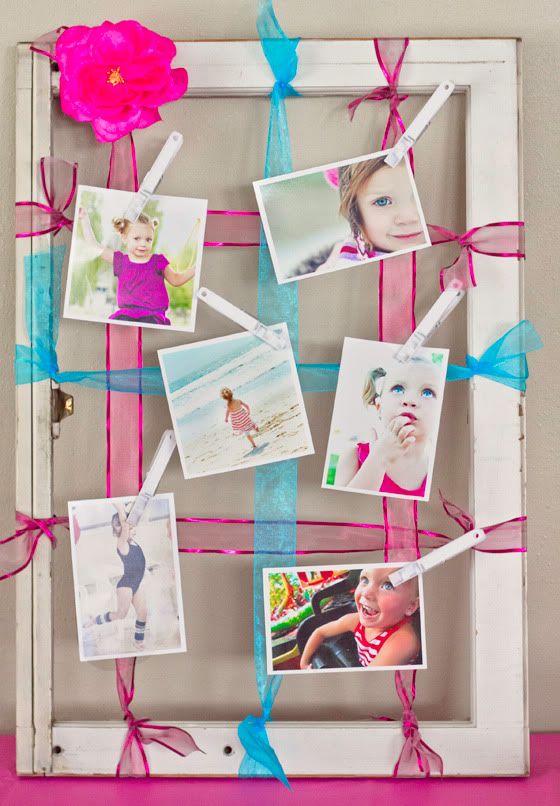 I have an old window frame that I use for lots of my decorating. This time I just tied lots of ribbon and then bought white cloths pins to attach the pictures....there always has to be pictures at a party :)
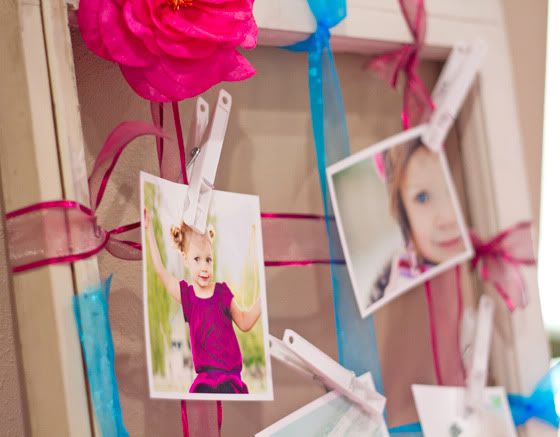
* I gotta say thanks to Craig for helping me get it all setup. He made sure I didn't fall when I stacked two wobbly chairs and a box on top of each other to stand on so I could hang the tissue balls from the ceiling. :) Your the best babe....I know i'm crazy!
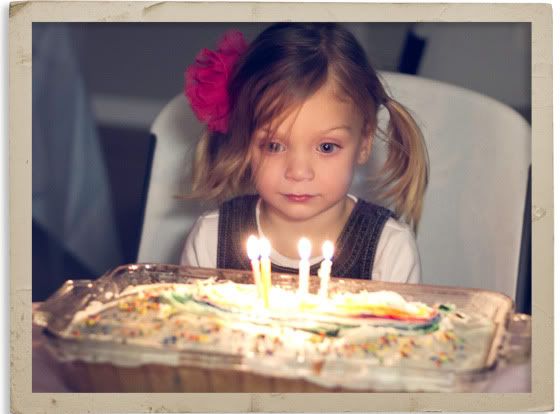
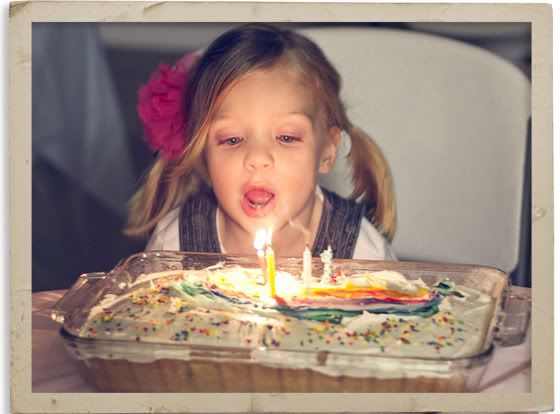
THE BIRTHDAY GIRL:
Sheila and Mike made Kylin a cute rainbow birthday cake....
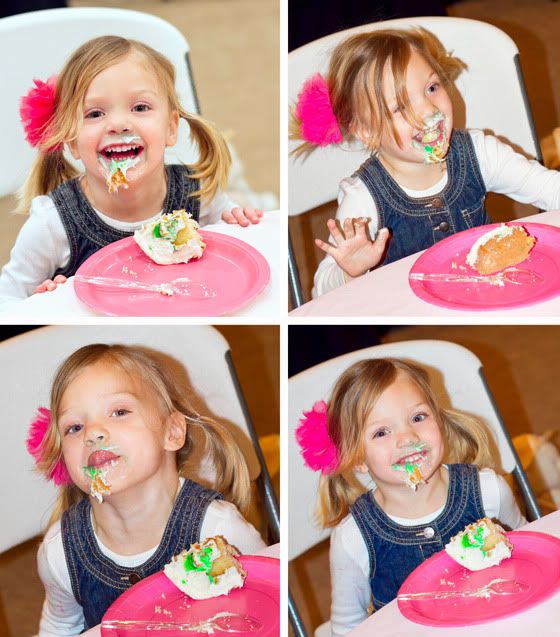
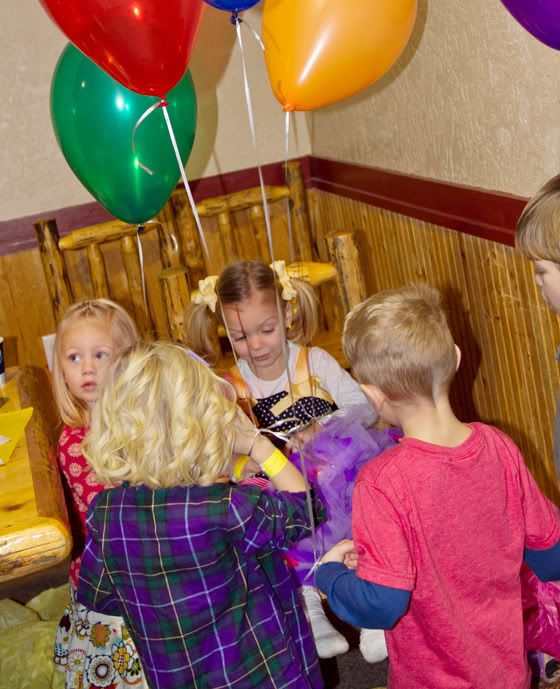
I don't know what gave here this silly idea, but she just shoved her face into her cake and ate it like a little piggy. And since it was her birthday she knows *in her own words* "I can do whatever I want". It was pretty funny!
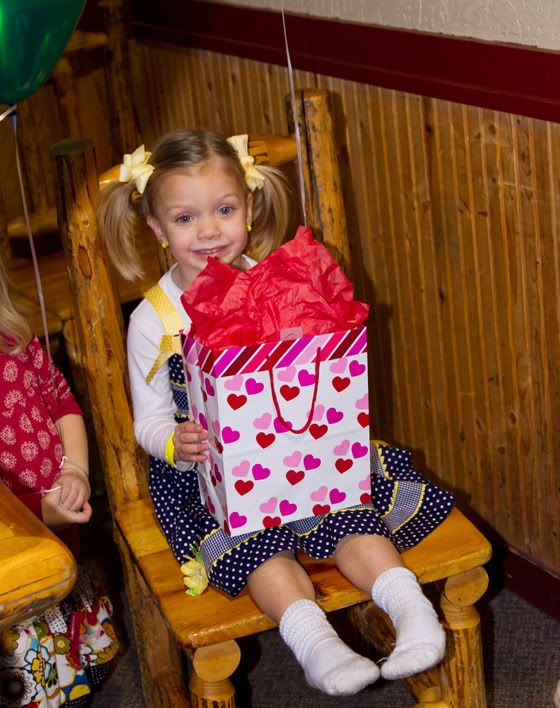
 For her "Heavy Hangover" Birthday wishes, she kept wishing everyone Disneyland Cruises because she wants to go on one so bad :) Actually....so do I! She got lots of wonderful presents from everyone. It was so great to have family come and celebrate with our special girl.
For her "Heavy Hangover" Birthday wishes, she kept wishing everyone Disneyland Cruises because she wants to go on one so bad :) Actually....so do I! She got lots of wonderful presents from everyone. It was so great to have family come and celebrate with our special girl. Thank you SO MUCH everyone for coming...it really means a lot to me! I hope you had a great time.
FRIENDS PARTY:
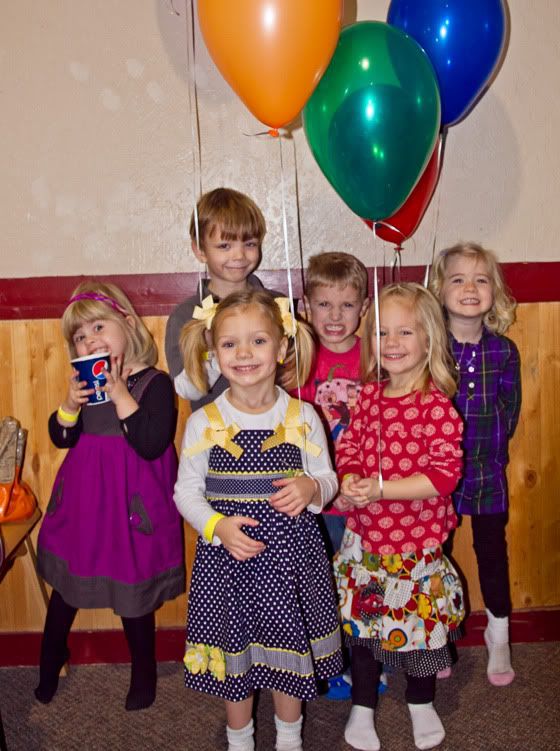
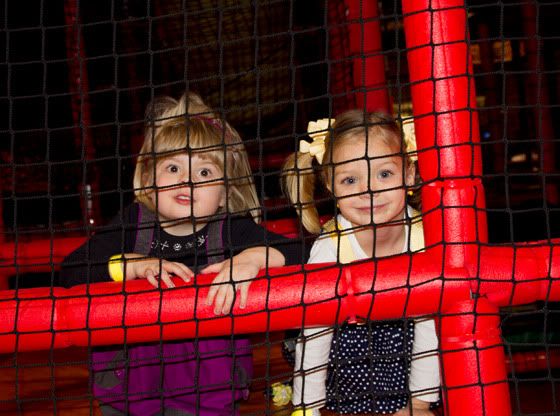
I didn't want to decorate another party cause I was pooped, so we decided to do her party at the "Cache Valley Fun Park". Soooo glad I did because they took care of everything and it was lots of fun for her. She invited 4 friends plus Mckay. There was pizza, soda, cake and lots of decorations. Then everyone got to play in the HUGE 3 story bouncy playland. I didn't take lots of pictures because Pip was running around every where and I was watching 7 kids :) But here are a few....
 LOTS OF FUN...hope you had a great Birthday Kylin....WE LOVE YOU!
LOTS OF FUN...hope you had a great Birthday Kylin....WE LOVE YOU!
Subscribe to:
Posts
(
Atom
)
